

How to Upgrade a CPU
How to upgrade a CPU
If you built your PC from scratch, and so upgrading your key processing unit of measurement (aka processor, or CPU) shouldn't present too much of a challenge — just contrary the steps you lot used to install it. However, if you purchased a pre-built gaming desktop, or had some aid from a more tech-savvy friend, rooting through your computer's guts to swap out its very eye may sound downright daunting.
The good news is that swapping out a CPU is not very hard, provided you have all the right information and tools at your disposal. In fact, there'south a good run a risk yous'll spend more than time prepping for the process than you will spend actually upgrading the processor. With that in mind, here are a few unproblematic steps for choosing and installing a make-new CPU for your favorite gaming or productivity PC.
- Buy i of the best gaming desktops
- Play the best PC games
- Encounter how to criterion your graphics carte
Bear in mind that we took these photos with an Intel processor; installing or replacing an AMD processor will involve a slightly unlike process.
ane. Ensure that your CPU is compatible with your motherboard.
Cipher will stop your CPU upgrade in its tracks faster than finding out that your computer can't support your new processor. The bad news is that this requires a lot of research upwards front to ostend what will and won't work; the proficient news is that in that location are lots of resource online to assist yous with that research.
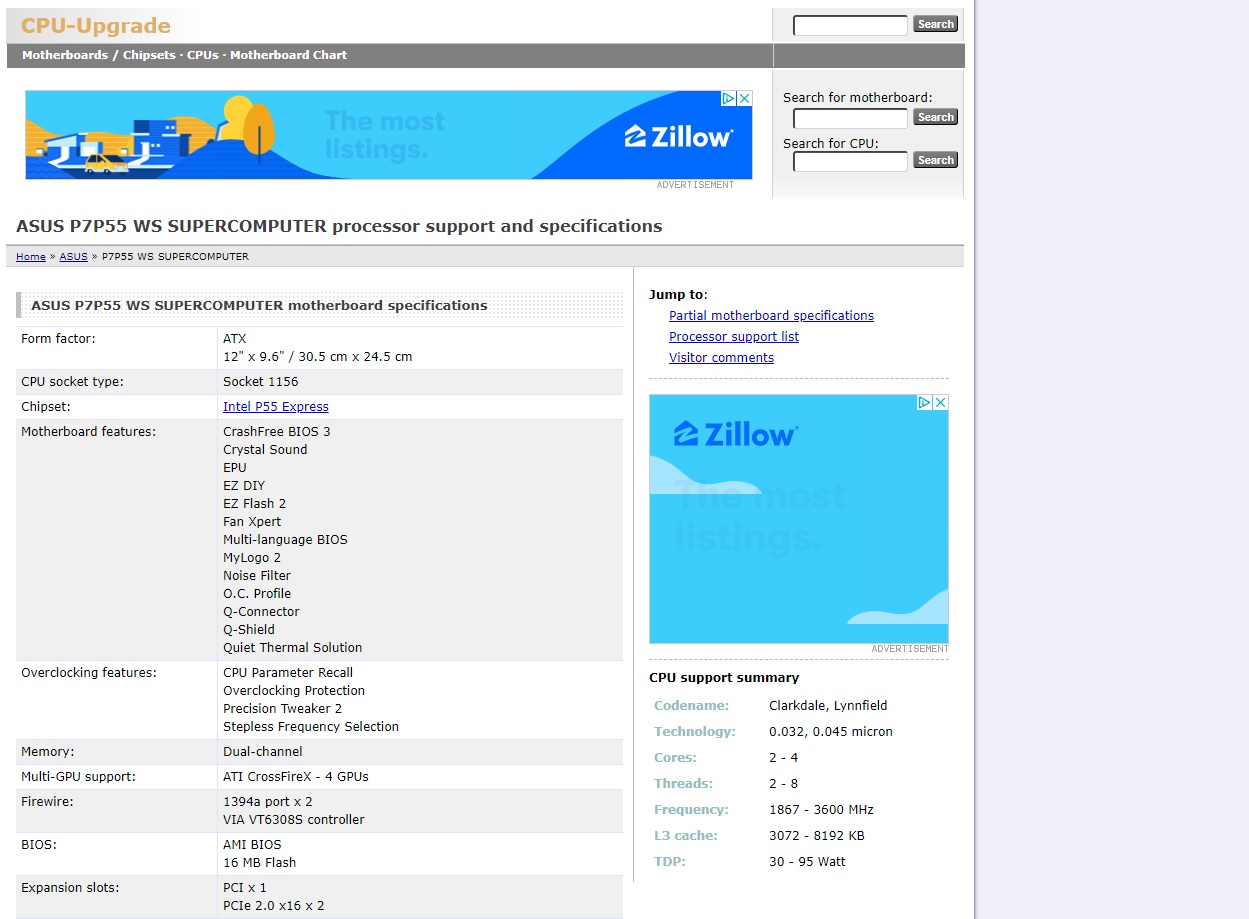
The all-time tool I've found in my search is a site called CPU-Upgrade. This resource lets you look upward your motherboard, then examine which Intel and AMD chips will work with it. The site isn't 100% complete — there are no Lenovo/Skybay motherboards listed, for instance — simply it's an excellent identify to commencement your search.
And yeah, it's going to look a little imposing, because there are most 1,000 variables that go into motherboard/CPU compatibility. My best communication is just to dive in and stick to the wide strokes. Are your motherboard and CPU compatible? Good! Then yous don't demand to sweat the minutiae.
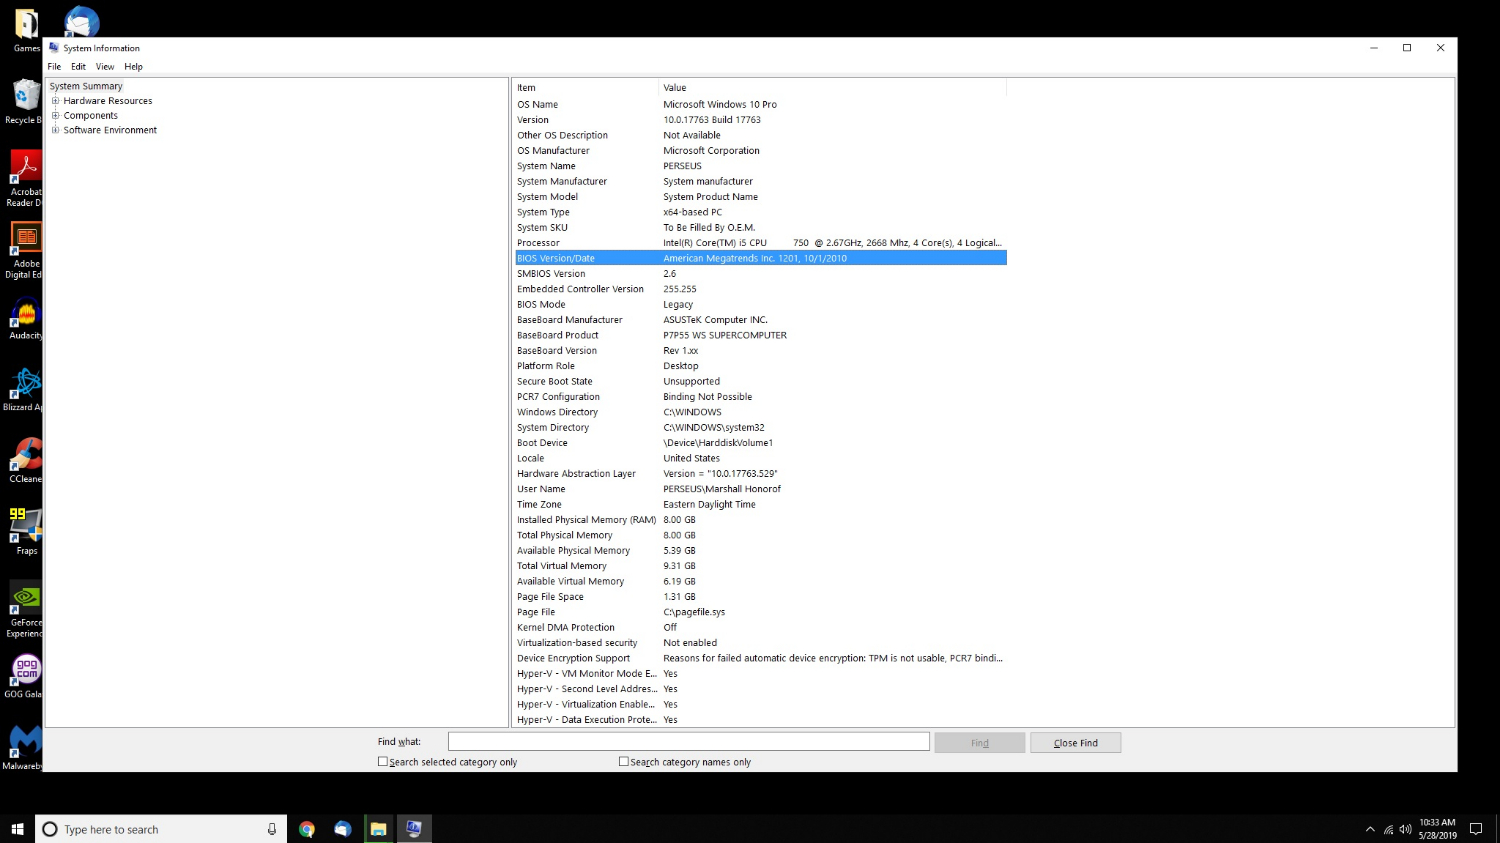
For the record, in social club to find out what kind of motherboard you accept, go into the Windows search bar and blazon "msinfo32." This will bring you to the System Data panel, where you'll find BaseBoard Manufacturer (e.1000., ASUS) and BaseBoard Product (e.g., P7P55 WS SUPERCOMPUTER).
If, for any reason, you lot can't find compatibility info at CPU-Upgrade, practise a Google search, or try Reddit or the Tom'due south Hardware forums. Someone volition almost certainly help out, every bit long as you ask nicely.

2. (Optional) Back up your data.
I admit that I'thou a little superstitious most this, but my philosophy is this: If you're going to swap out a figurer part, back up annihilation that you tin't bear to lose first. Theoretically, swapping out your CPU should non affect your difficult drive at all, even if y'all botch the procedure beyond all hope of repair. (Have centre; this is very hard to do.)
Yet, there are simply a lot of factors at play every fourth dimension y'all crack open your computer case, and you'll be glad you backed up your files if you lot run afoul of static electricity, or screwdriver slippage, or some well-significant pet knocking the whole system downward a flight of stairs. So take a few minutes and save your files externally. You tin can upload them to a USB stick or hard drive — or you tin employ one of the all-time cloud backup services to salvage your files online.
iii. (Optional) Update your BIOS.
Updating your Basic Input/Output Organisation (BIOS) is one of those things you don't strictly have to do, but could aid head off a potential problem at the pass. Think of BIOS as your motherboard'due south operating organization – the software that runs the computer if yous don't have Windows or Linux installed. Even so, your BIOS version is extremely important, since it tin influence settings like voltage and hardware compatibility. The odds of yous needing to update your BIOS before you install a new CPU are small — merely they do exist.
Unfortunately, there's no catch-all guide to updating your BIOS, as it really depends on what kind of system you have. Newer systems might have software packages built right into Windows; older systems might demand y'all to download software to your difficult drive and track it down during a restart. (If you lot oasis't updated your BIOS in a few years, you may fifty-fifty accept to upgrade to every version in-between yours and the electric current one first.)
Every bit with many things, the all-time solution is to Google "(your motherboard) BIOS update" and meet what comes up. Only be admittedly sure that you don't accidentally endeavour to update your arrangement with a similarly named BIOS program. The best-instance scenario is that it won't piece of work; the worst-case scenario is that information technology will brick your computer. See the Tom's Hardware's comprehensive guide to BIOS functionality.
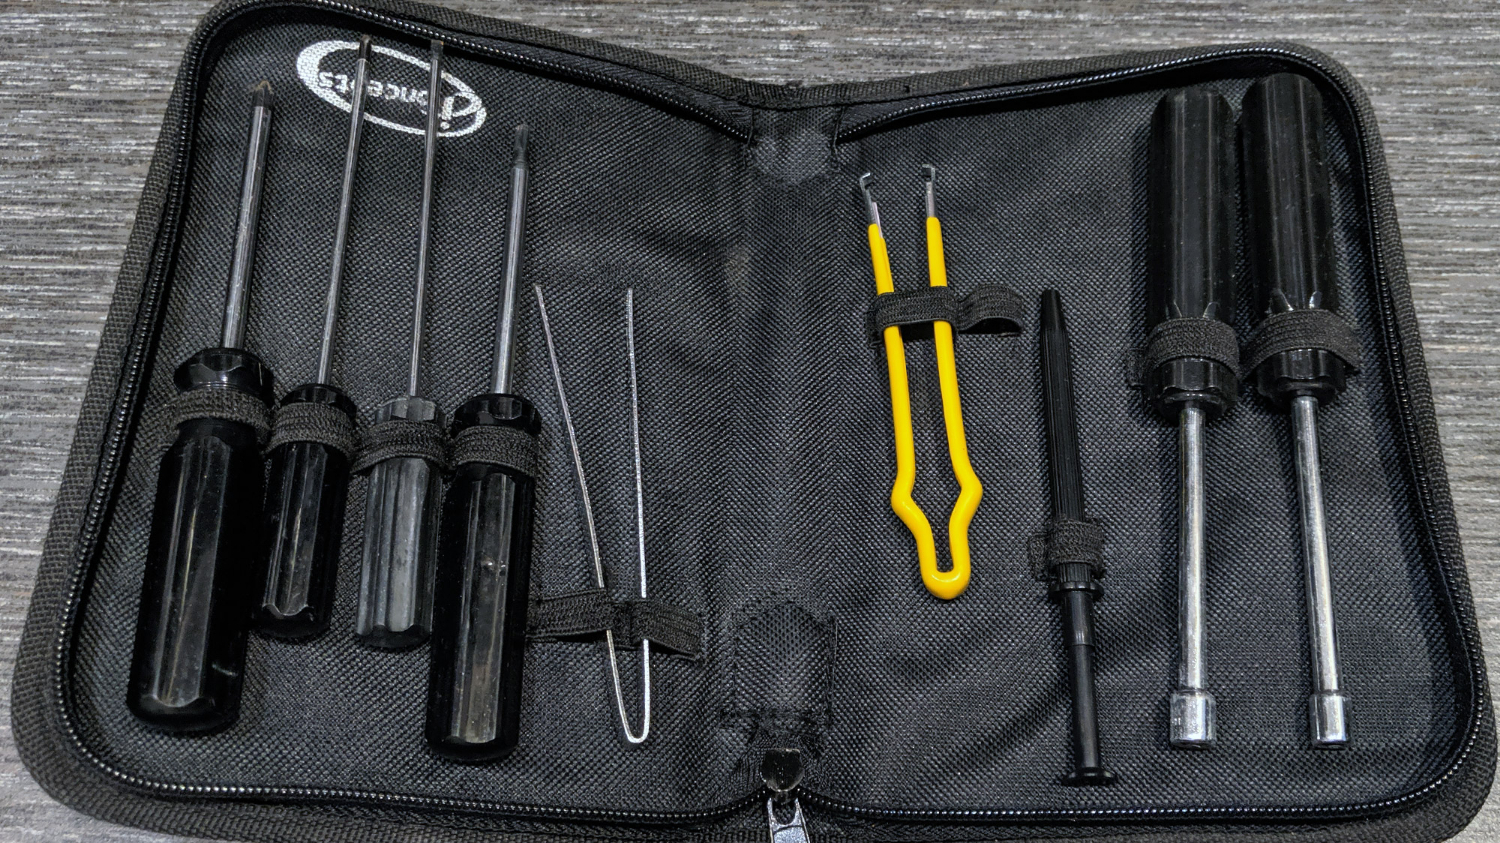
In guild to upgrade your CPU, you lot'll demand a soft cloth, paper towels, rubbing alcohol and thermal paste. You'll almost certainly need a screwdriver, although what kind depends on how your heatsink and computer case are secured. I got by simply fine with a small-scale Phillips head; your needs may vary.
You can as well wear an anti-static ring if you want to play things really safe. Personally, I found information technology easier to just ground myself every so often. You can do this with anything, from a sink faucet to the outside of your figurer case, and then long every bit it's made of metallic.
Similarly, yous'll desire a hard surface on which to work, such as a workbench, or even a hardwood flooring. (You should probably clean said section of flooring first.) A basin to hold loose screws never hurt anyone, either. Avoid rugs and carpets; accept your socks off if yous're particularly superstitious, and don't vesture a fuzzy sweater.
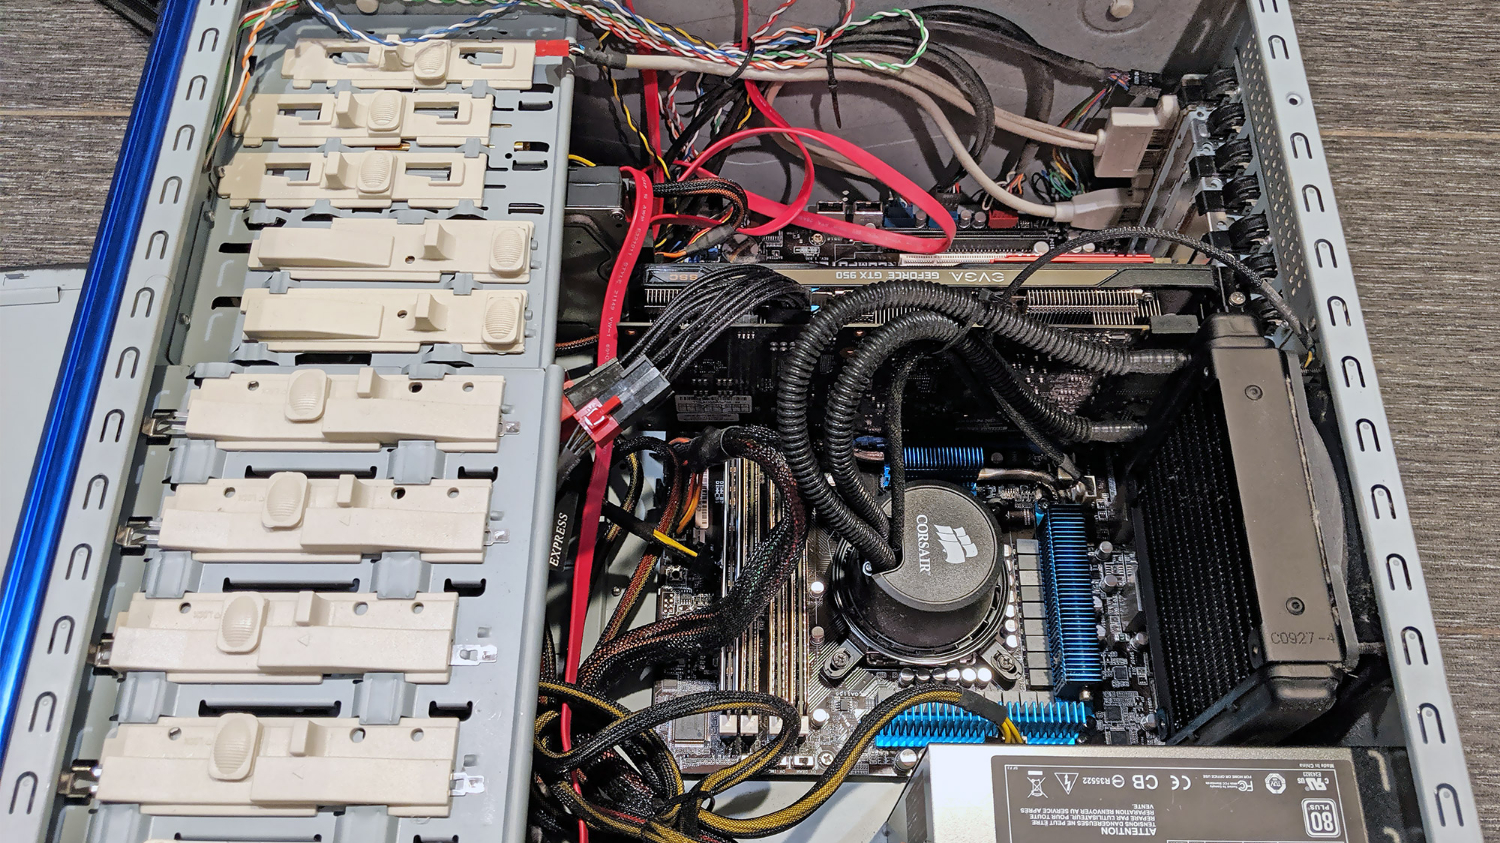
5. Crack open your PC.
Unsurprisingly, yous've got to open your PC before y'all practice any work within of it. (Apologies for the absolute mess of wires inside mine; you keep things equally make clean as you can, but at a certain betoken, y'all just accept the chaos for what it is.)
Since you've opened up your computer, it never hurts to grab a tin of compressed air and accident the dust out of everything.
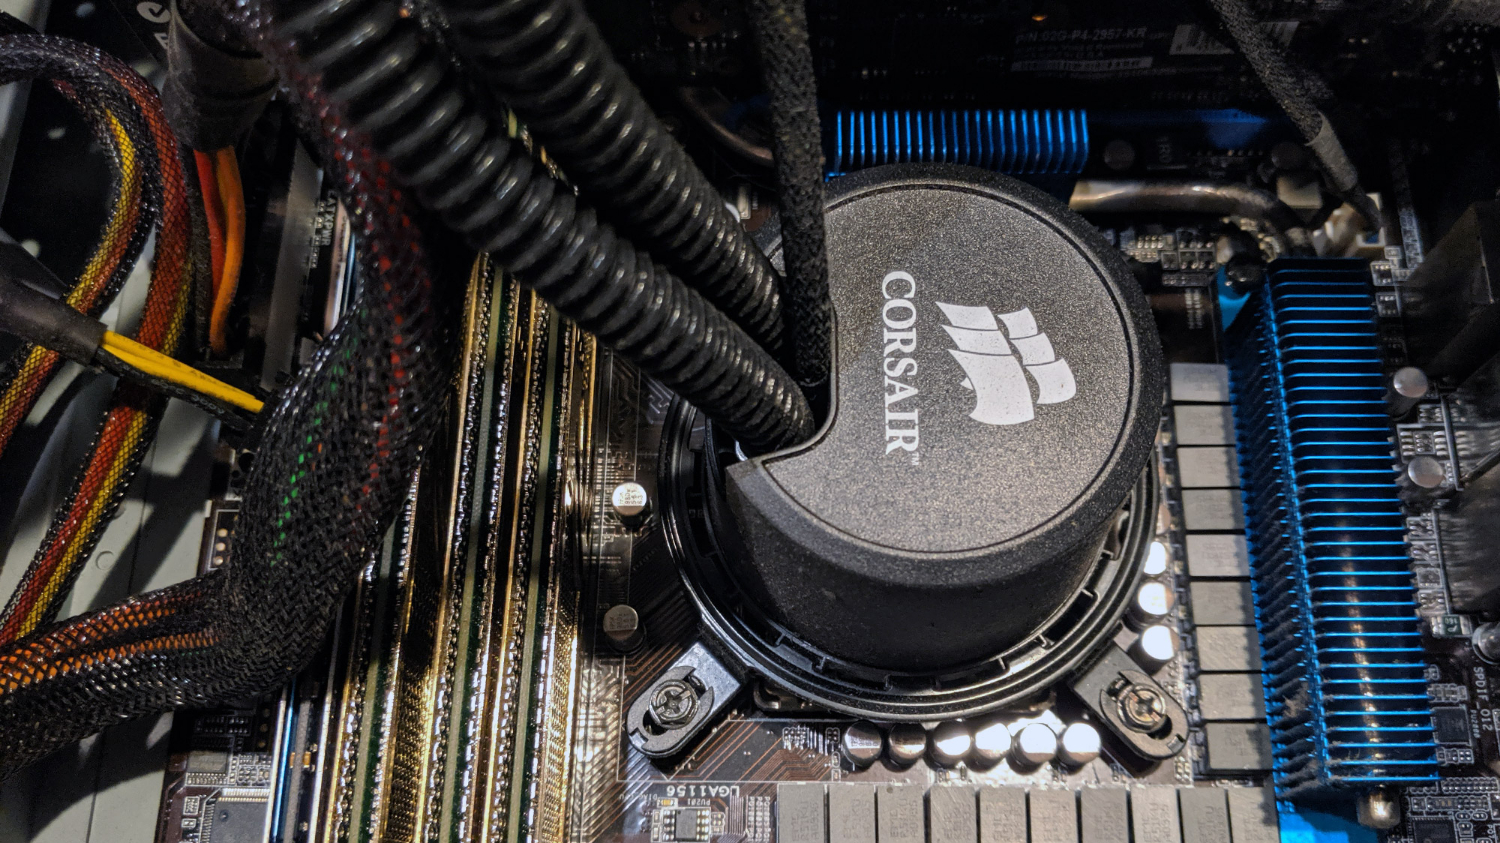
6. Remove the heatsink or fan.
The heatsink is the part of your computer that connects to your processor on one end, and your fan on the other end. You may also have a simple fan instead. The heatsink's function is to collect and misemploy heat generated by the CPU. The fan'south part is to provide cool air inside your PC. As such, you'll have to remove either ane before you tin access the CPU itself.
Exactly how you accomplish this job will depend on what kind of heatsink or fan you have, just you'll probably have to unscrew whatsoever's keeping it in identify first. But use common sense here: Unscrew whatever needs to exist unscrewed, and don't pull too hard if something doesn't come loose at commencement. If you lot have any trouble removing it, find the model number and look it upwardly online. Someone may have tips on how to remove it safely.
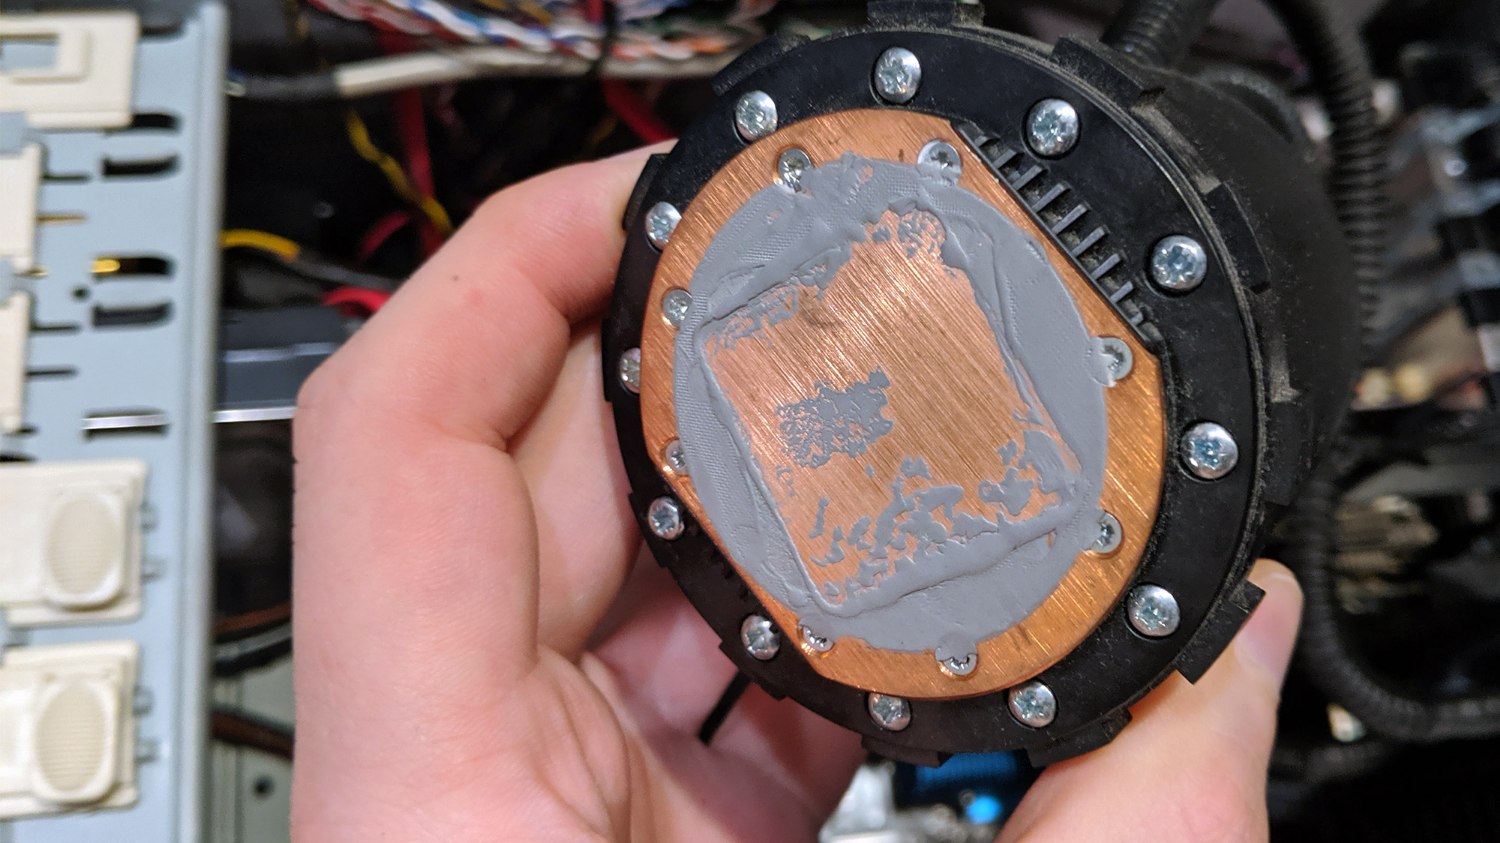
7. Clean off the old thermal paste.
Technically, the world wouldn't end if you leave old thermal paste on your heatsink or fan. But since you're about to apply a new coat anyway, it'due south better to get rid of the former stuff and offset fresh. (You don't want a layer of thermal paste on top of another layer of thermal paste, since this would reduce its conductivity and return the heatsink less effective.)
Luckily, old thermal paste is very piece of cake to remove. Merely employ some rubbing alcohol and a newspaper towel. If yous get a few drops of alcohol elsewhere in your figurer, it's not going to practice any harm; just make sure you don't get any devious $.25 of paper towel in there.
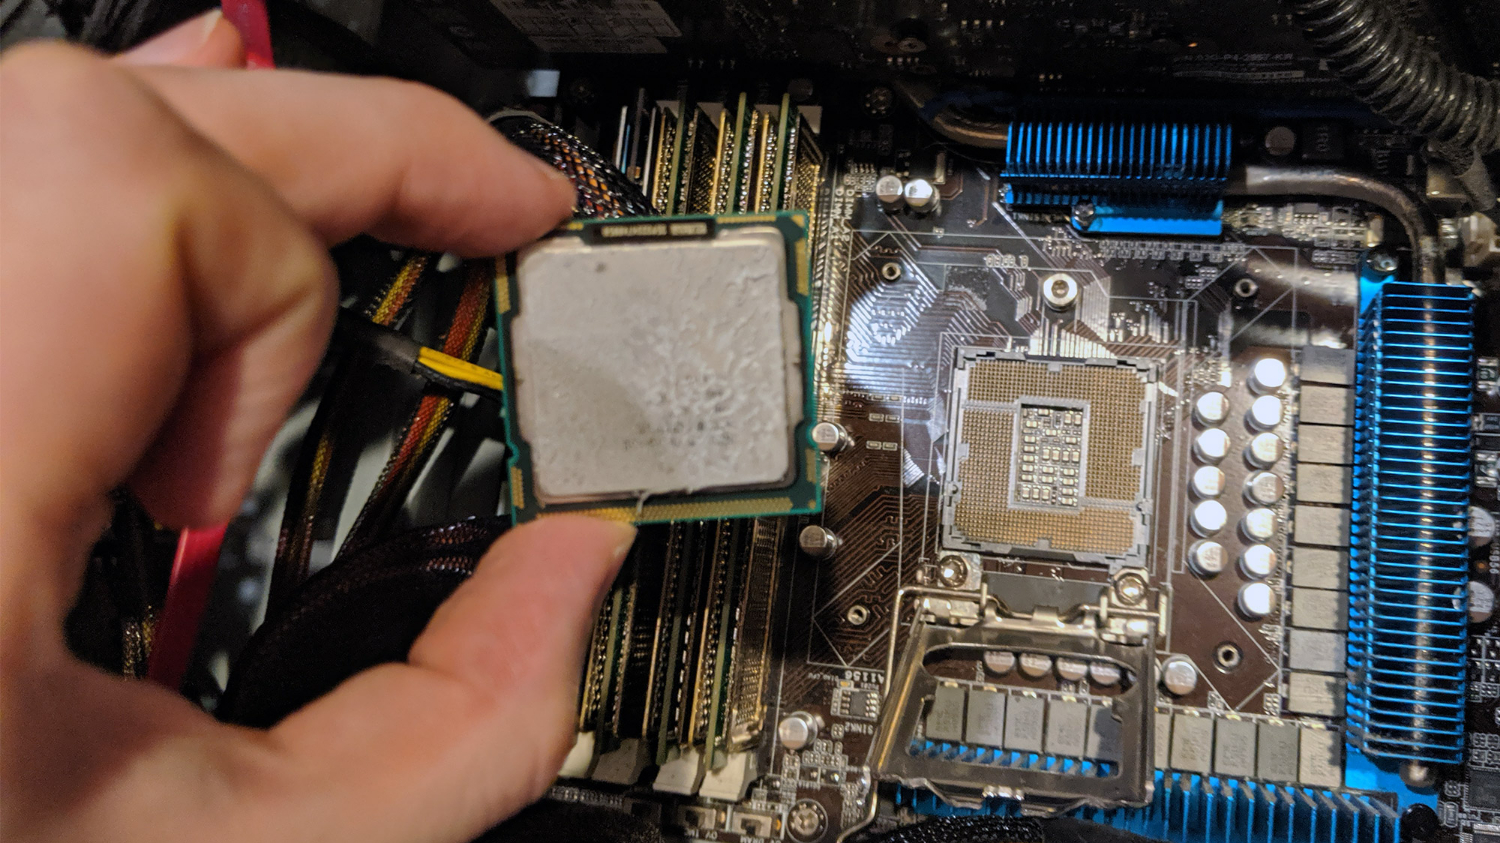
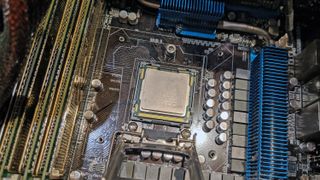
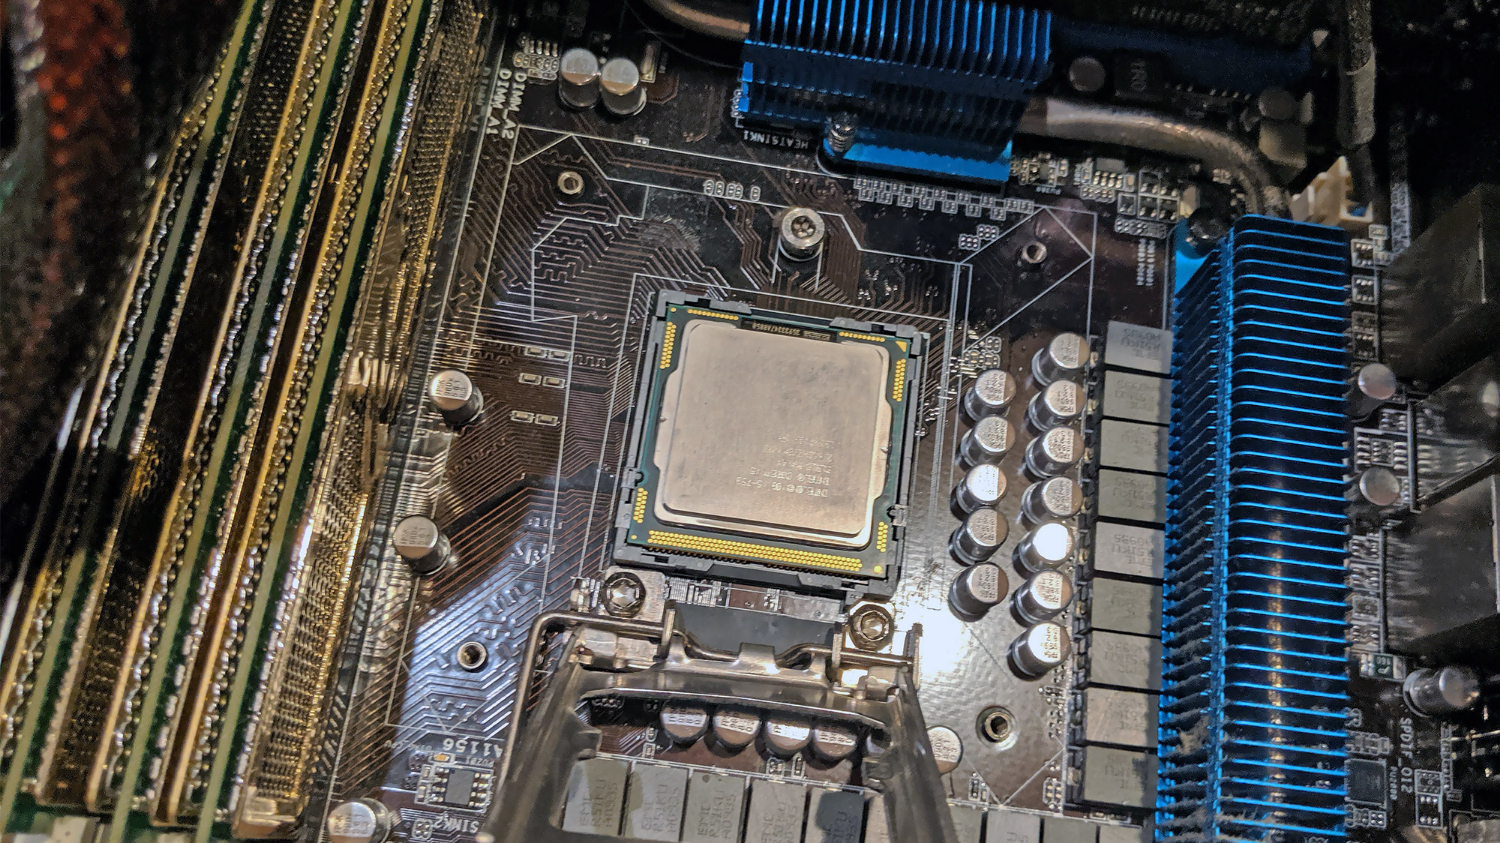
eight. Remove the old processor.
Under the heatsink or fan, yous'll see the sometime processor in its housing. In that location should exist a small metal lever somewhere to lift the housing off. Discussion to the wise: You may have to gently printing the lever downward and to the side commencement. As with other steps in this procedure, if you find yourself pulling difficult on a component, you're probably missing a very easy, gentle way to remove it.
Once yous've raised the housing, all yous accept to do is lift the processor out. At that place's nix else securing it.
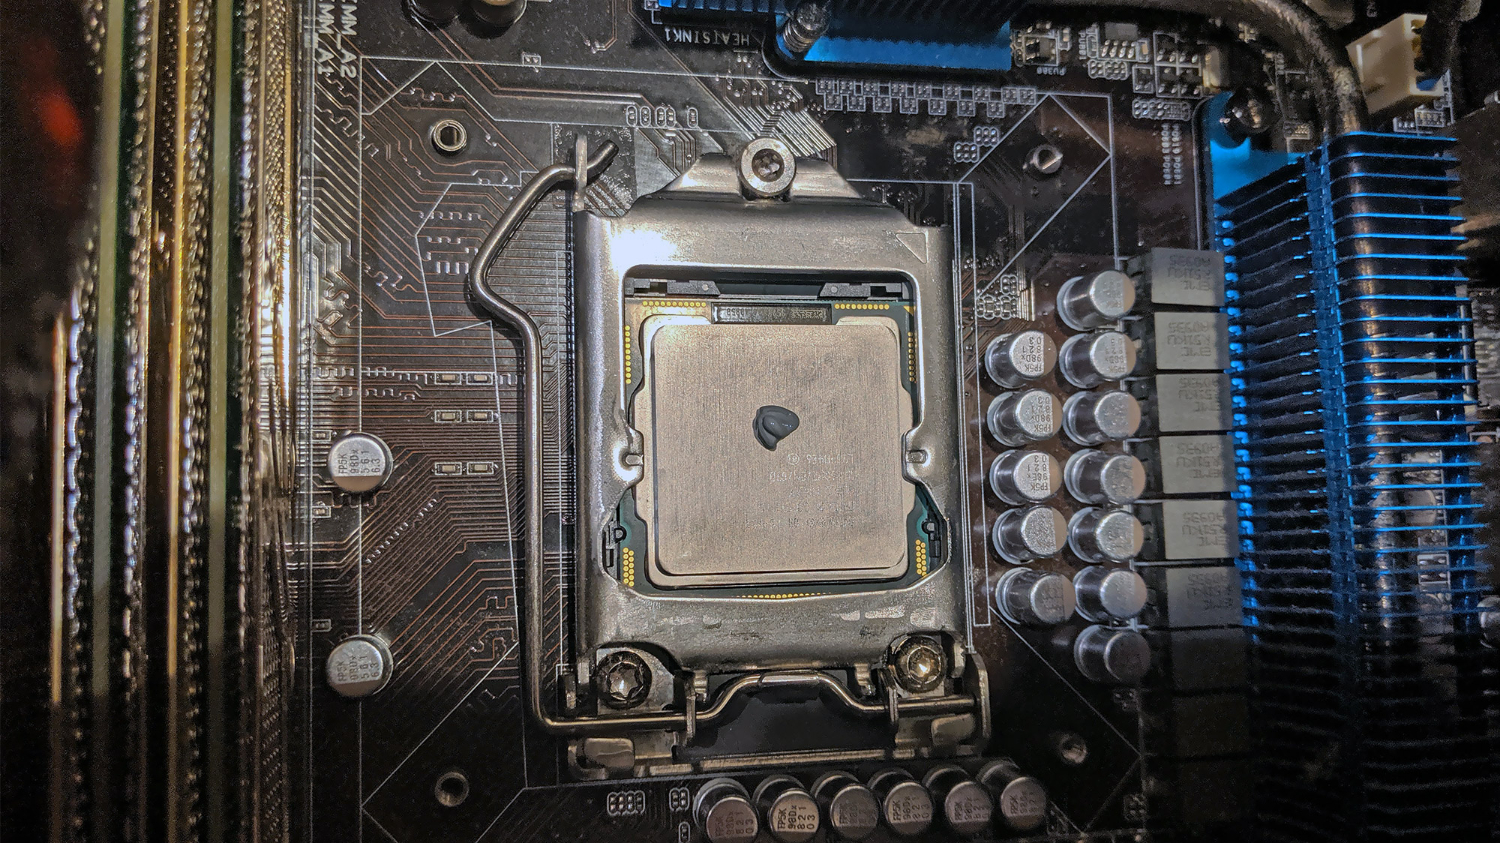
nine. Secure the new processor.
In what is, by far, the simplest part of the whole procedure, gently place your new processor down where your old one used to exist. There will be two small indentations on the side of the processor, then make sure that they match upwardly with the indentations in the housing. You'll know the processor is in correctly when information technology'south sitting flat. Then, lower the housing and secure it with the metal bar again.
10. Apply thermal paste.
If you ask online, you're going to get a lot of opinions nearly the "best" way to employ thermal paste. Drawing an X, making a cross, spreading it in advance, letting gravity exercise the work — there are plenty of methods, and some evidence in favor of (and confronting) each one.
The curt version is that unless you're edifice some kind of supercharged, overclocked powerhouse, how you apply thermal paste is non going to brand or break the machine. I personally went with the "grain of rice" method, and fabricated a very small ball right in the center of the processor. The heatsink — and the oestrus of the processor itself — should have intendance of spreading it over time.
Basically, when it comes to thermal paste, less is more, and yous can always redo it if you find that your computer is running manner also hot. It's the virtually open-concluded part of the procedure, simply it's not the hardest, unless y'all drive yourself crazy over it.
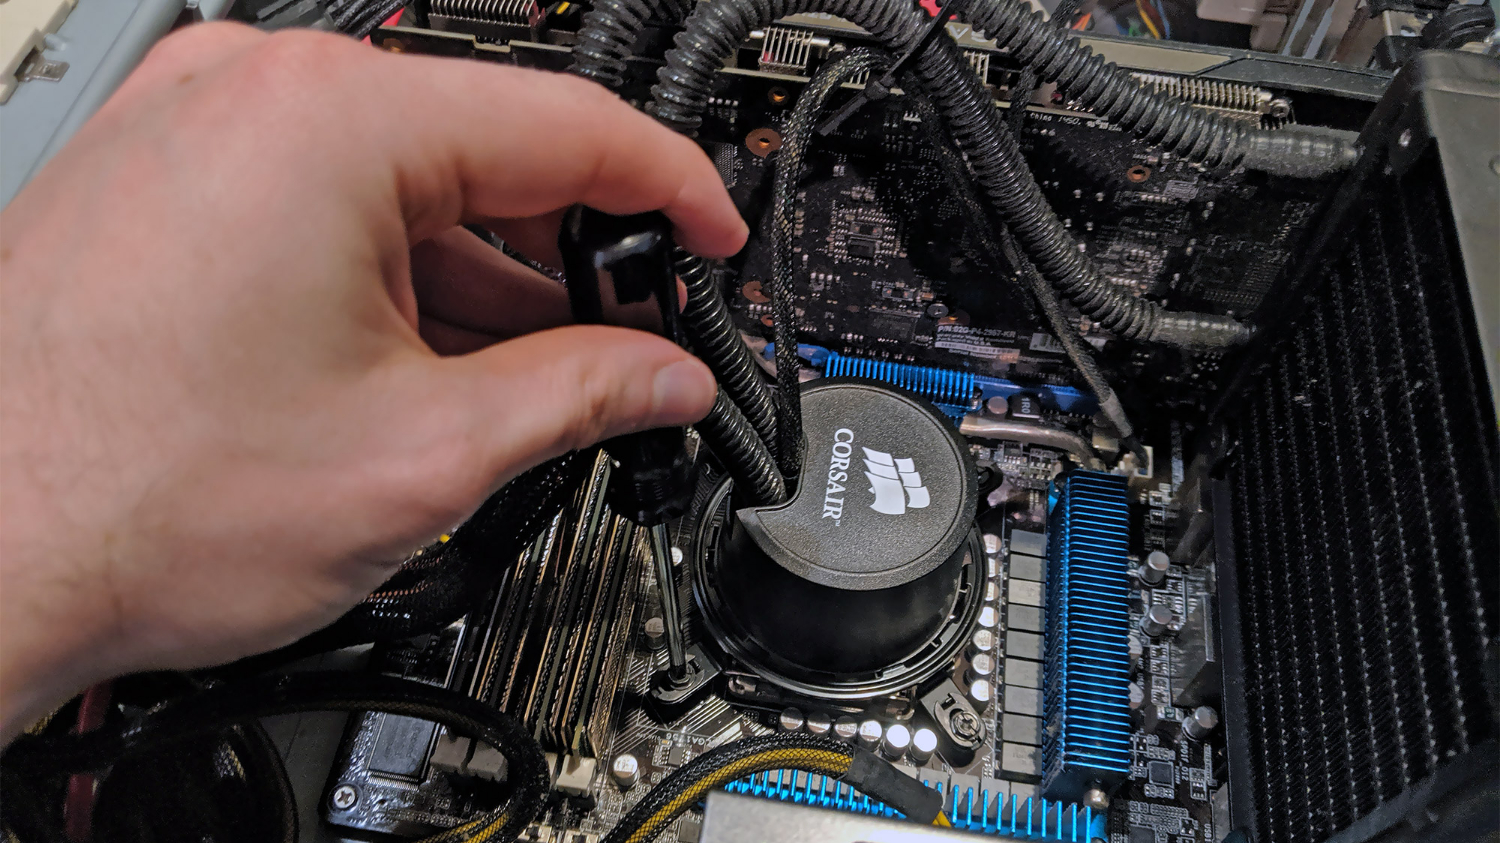
11. Reinstall the heatsink or fan.
Whatever y'all did to accept the heatsink or fan out, reverse the process. Screw everything back in tightly, but non and then tightly that it will curve or pause the cooling unit's construction.
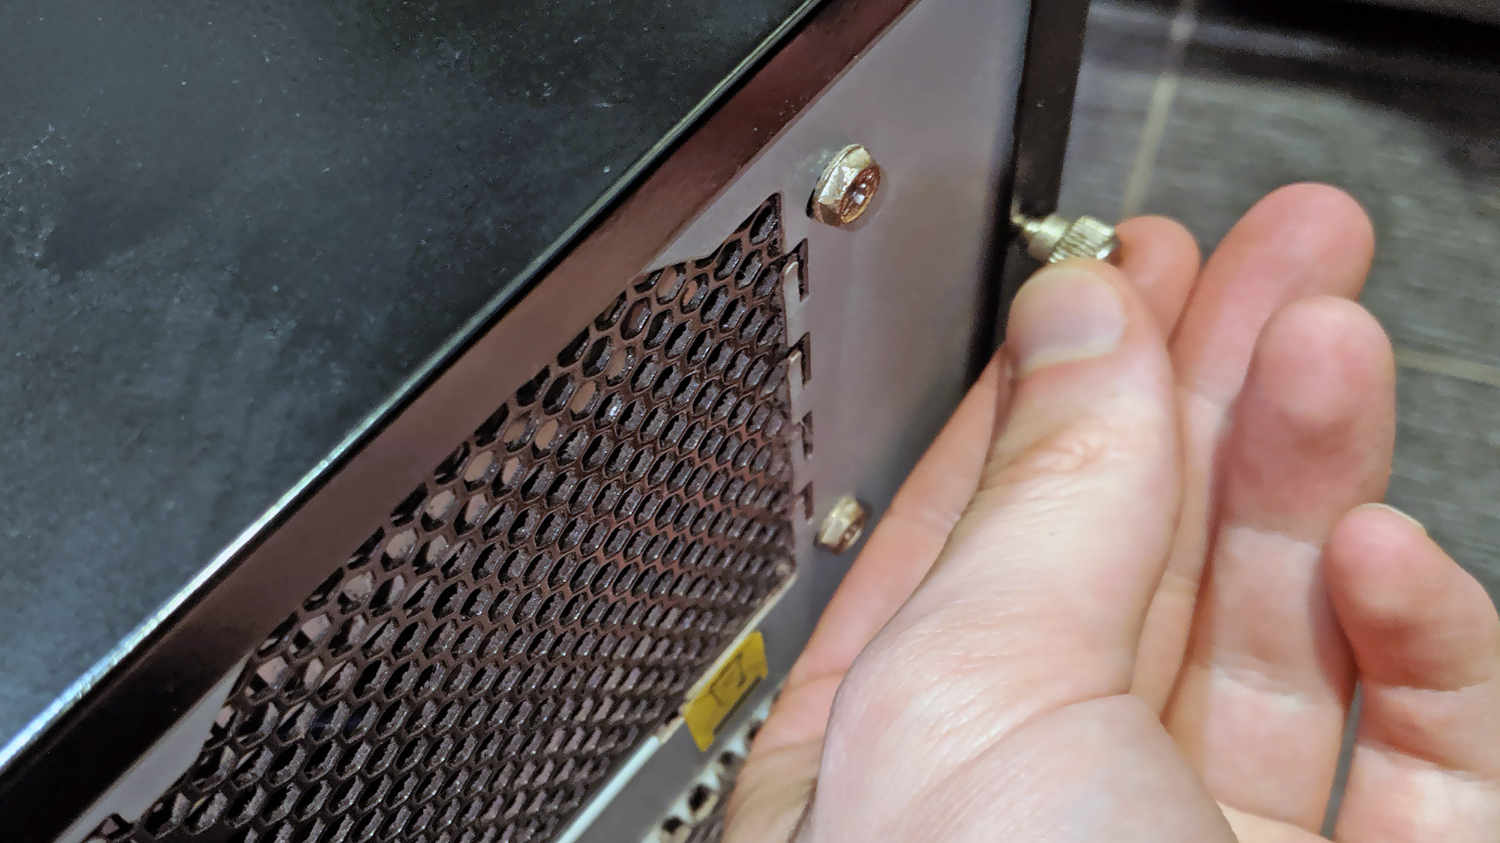
12. Shut up the calculator.
Yous're done! Reconnect your computer to its power source, boot it up, and makes sure everything is working properly. Your BIOS should recognize the presence of a new CPU and run through a curt setup process. Only follow the prompts, and so let the computer restart.
Since thermal paste spreads and settles by the application of heat, yous'll want to run your computer for a few hours when you become a gamble. Yous should practice something taxing, like edit videos or play a demanding game, and ensure that the CPU's oestrus stays within adequate parameters. (I like the Intel XTU software for this, simply in that location are other options, too.) If information technology doesn't, there are ways to mitigate your oestrus output, such cleaning out the fans, or investing in ameliorate cooling options.
- Is PC gaming worth the hassle?
- Best PC controllers
- Gaming desktop buying guide

Source: https://www.tomsguide.com/us/how-to-upgrade-cpu,news-30226.html
Posted by: rodriguezforling.blogspot.com
0 Response to "How to Upgrade a CPU"
Post a Comment